Category:Guides screenshots
From Guild Wars 2 Wiki
Jump to navigationJump to search
Screenshot category of any screenshots that aim to guide players to find, navigate or achieve something concrete, often highlighting the important bits.
This category could be later cut into two: one for any map screenshots and other for the rest; or include more subcategories depending on the type of guide, etc.
Subcategories
This category has the following 13 subcategories, out of 13 total.
A
- Achievement map images (3,206 F)
- Achievement screenshots (2,166 F)
D
- Decorating guide screenshots (23 F)
E
- Event map images (21 F)
G
- Guild Trek map images (186 F)
J
- Jumping puzzle map images (71 F)
- Jumping puzzle screenshots (547 F)
M
- Mini-dungeon map images (14 F)
O
- Object map images (474 F)
P
- Pet map images (139 F)
R
- Rift map images (35 F)
S
Media in category "Guides screenshots"
The following 200 files are in this category, out of 1,891 total.
(previous page) (next page) "Black Powder and Its Uses" location.jpg 320 × 350; 46 KB
 "Cryptonym" Strongbox gallery 1.jpg 1,920 × 1,080; 525 KB
 "Cryptonym" Strongbox gallery 2.jpg 1,920 × 1,080; 627 KB
 "Cryptonym" Strongbox gallery 3.jpg 1,920 × 1,080; 732 KB
 "Cryptonym" Strongbox gallery 4.jpg 1,920 × 1,080; 723 KB
 "Where's Balthazar" mushrooms 1.jpg 1,038 × 665; 143 KB
 "Where's Balthazar" mushrooms 2.jpg 858 × 615; 144 KB
 "Where's Balthazar" mushrooms 3.jpg 1,030 × 660; 215 KB
 "Where's Balthazar" mushrooms 4.jpg 978 × 695; 225 KB
 2-MULT's path.jpg 380 × 768; 103 KB
 16 Phoenix, 1325 AE.jpg 1,177 × 714; 134 KB
 A Brief Reflection on Olaf Olafson.jpg 648 × 475; 69 KB
 A Celebration of Meat.jpg 969 × 610; 206 KB
 A Chapter Closed.png 329 × 352; 292 KB
 A Collective History Vol 2 Room.jpeg 1,920 × 1,080; 624 KB
 A Fungus Among Us map.jpg 957 × 419; 224 KB
 A Kralkatorrid Affair location.jpg 1,920 × 1,080; 333 KB
 A Legacy Damned route map 1.jpg 1,762 × 1,126; 563 KB
 A Poem for Mother—The First Day map.jpg 550 × 350; 206 KB
 A shipment of supply has arrived from the Edge of the Mists.jpg 392 × 414; 63 KB
 A Wizard's Folly by Snargle Goldclaw.jpg 786 × 817; 132 KB
 Abandoned Temple Rooftop - base mastery guide.jpg 1,494 × 838; 528 KB
 AC Cave Troll Spawn Locations.png 1,280 × 720; 1.24 MB
 Access Panel map.jpg 594 × 632; 128 KB
 Adda location.jpg 550 × 350; 226 KB
 Adnul Irongut map.jpg 492 × 553; 127 KB
 Adventurer Thrada location.jpg 354 × 487; 78 KB
 Aether Chest map.jpg 610 × 1,013; 258 KB
 Aetherblade Cache - Hidden Chest 1.jpeg 1,600 × 900; 482 KB
 Aetherblade Cache - Hidden Chest 2.jpeg 1,600 × 900; 272 KB
 Aetherblade Cache - Hidden Chest 3.jpeg 1,600 × 900; 346 KB
 Aetherblade Fractal, Elite Atherblade Golem activation phases.gif 744 × 823; 215 KB
 Aetherblade Hideout - Hidden Entrance.jpg 1,157 × 651; 266 KB
 Aetherblade Hideout Path.jpg 800 × 800; 91 KB
 Aetherblade Quartermaster map.jpg 461 × 443; 123 KB
 Agent Otto Barenjaard Rata Sum map.jpg 408 × 131; 22 KB
 Aid the servants as they construct a camp map.jpg 645 × 622; 271 KB
 Alessia's Secret Observation Point.jpg 772 × 645; 211 KB
 Alternative Magellan's Memento Jumps.jpg 1,182 × 531; 129 KB
 Amber Keystone first location.jpg 1,920 × 1,080; 617 KB
 Amber Keystone second location.jpg 1,920 × 1,080; 596 KB
 Amber Keystone third location.jpg 1,920 × 1,080; 801 KB
 Amnoon Council Seal map.jpg 1,315 × 1,139; 540 KB
 Amnoon Council Seal.jpg 2,560 × 1,440; 1.15 MB
 Anchor location.jpg 346 × 243; 7 KB
 Ancient Archive map.jpg 805 × 622; 247 KB
 Ancient archive start location.jpg 1,920 × 1,200; 1.03 MB
 Ancient Golem Part alternative lean gliding path 1.jpg 1,920 × 1,080; 820 KB
 Ancient Golem Part alternative lean gliding path 2.jpg 1,920 × 1,080; 858 KB
 Ancient Golem Part alternative lean gliding path 3.jpg 1,920 × 1,080; 730 KB
 Ancient Golem Part lean final glide.jpg 615 × 545; 142 KB
 Ancient Golem Part lean path split.jpg 948 × 519; 334 KB
 Ancient Golem Part lean tree target.jpg 821 × 616; 275 KB
 Ancient Golem Part map (Advanced Gliding).jpg 695 × 1,458; 627 KB
 Ancient Golem Part map (Lean Techniques).jpg 966 × 942; 578 KB
 Ancient Shark Pistrix location.jpg 530 × 407; 162 KB
 Ancient Spring Water Sample - location.jpg 278 × 262; 63 KB
 Ancient Tome map.png 711 × 547; 908 KB
 Ancient Weapons map.jpg 970 × 1,058; 434 KB
 Ander "Wildman" Westward map.jpg 1,024 × 645; 255 KB
 Anjekas Shrine entrance.jpg 2,560 × 1,440; 807 KB
 Anjekas Shrine map view.jpg 949 × 1,415; 560 KB
 Anjekas shrine second cave.jpg 2,560 × 1,440; 964 KB
 Anomaly Gendarran Fields path.jpg 750 × 389; 133 KB
 Anomaly Iron Marshes Path.jpg 690 × 1,402; 167 KB
 Anomaly Timberline Falls path.jpg 573 × 800; 186 KB
 Antimony location.jpg 1,068 × 608; 589 KB
 Antonin location.jpg 453 × 350; 61 KB
 API event details coordinate recalculation - continent 1.png 827 × 815; 717 KB
 API event details coordinate recalculation - continent 2.png 827 × 815; 720 KB
 API event details coordinate recalculation - map 1.png 704 × 592; 320 KB
 API event details coordinate recalculation - map 2.png 704 × 592; 323 KB
 Apprentice Mekteki map.jpg 445 × 465; 181 KB
 Aquatic Ruins Fractal Dolphin path.jpg 918 × 839; 411 KB
 Arborstone Inn Getting There.jpg 1,369 × 1,561; 582 KB
 Archaeologist and Researcher guide.jpg 422 × 368; 70 KB
 Archival Records Legavo the Binding of Wills location.jpg 115 × 160; 13 KB
 Arnaud location.jpg 1,508 × 1,036; 1.36 MB
 Artie the Jeweler map.jpg 570 × 375; 110 KB
 Artisan locations in Citadel.jpg 375 × 438; 75 KB
 Ascalon Settlement Vista Path.jpg 271 × 308; 35 KB
 Ascalonian Catacombs location.jpg 474 × 458; 193 KB
 Ash Training Course documents.jpg 1,890 × 1,008; 806 KB
 Ash Tribune Quarters map.jpg 674 × 459; 281 KB
 Aspenwood Start - Map.jpg 331 × 331; 43 KB
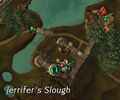 Assault Jerrifer's Slough.jpg 359 × 298; 143 KB
 Asset Recovery Chest 1.png 2,152 × 1,080; 4.18 MB
 Asset Recovery Chest 2.png 2,048 × 1,255; 4.02 MB
 Asset Recovery Chest 3.png 1,983 × 937; 4.1 MB
 Asset Recovery Chest 4.png 1,384 × 981; 2.75 MB
 Asset Recovery Chest 5.png 2,129 × 999; 4 MB
 Assist Fahd al'Eshadhi in eliminating krait patrols map.jpg 275 × 275; 51 KB
 Astral Ward Medic Miyrna (Bava Nisos location).jpg 286 × 204; 18 KB
 Astral Ward Researcher Lutorius Tomeweaver location.jpg 790 × 1,184; 122 KB
 Astralaria 3 Mechanism.png 4,590 × 4,461; 1.68 MB
 Astralaria 4 Cosmos.png 4,581 × 5,661; 2.09 MB
 Asuran Experimental Weapon location.jpg 3,618 × 1,290; 1,010 KB
 Atholma Boat Ride.jpg 805 × 564; 101 KB
 Atholma Race.jpg 1,072 × 695; 172 KB
 August in Beauty- In Her Memory map.jpg 550 × 350; 188 KB
 Aurora's Glow location.jpg 798 × 802; 217 KB
 Avenger of the Dispossessed Braham.jpg 381 × 419; 106 KB
 Avenger of the Dispossessed Rox.jpg 491 × 403; 112 KB
 Awakened Chest map - Bitumen Reserve.jpg 358 × 239; 129 KB
 Awakened Chest map - Deadhouse Insight.jpg 358 × 239; 96 KB
 Awakened Chest map - Deadhouse.jpg 358 × 239; 112 KB
 Awakened Chest map - Fort Huduh.jpg 351 × 234; 117 KB
 Azabe Qabar Gravestone Rubbing.jpg 999 × 264; 297 KB
 Bananas - bomb the back wall.jpg 1,920 × 1,080; 175 KB
 Bananas - jump down after 3rd checkpoint.jpg 1,920 × 1,080; 226 KB
 Bananas - left path.jpg 1,920 × 1,080; 406 KB
 Barkeep Weber location.jpg 270 × 259; 26 KB
 Barkeeper Tin-Eye map.jpg 373 × 402; 73 KB
 Barradin's Vaults map.jpg 413 × 400; 154 KB
 Bartender (Salma District) location.jpg 609 × 535; 324 KB
 Bartender Ebonhawke Location.jpg 422 × 422; 125 KB
 Basilisk's Light.jpg 651 × 701; 171 KB
 Bastion of the Penitent - Hidden Chest 1.jpeg 1,920 × 1,080; 574 KB
 Bastion of the Penitent - Hidden Chest 2.jpeg 1,920 × 1,080; 372 KB
 Bastion of the Penitent - Hidden Chest 3.jpeg 1,920 × 1,080; 320 KB
 Bastion of the Penitent - Hidden Chest 4.jpeg 1,920 × 1,080; 406 KB
 Bauble Backpack Oozes.jpg 1,132 × 629; 523 KB
 Bauble Backpack Slope.jpg 2,560 × 1,440; 679 KB
 Bay of Elon clam location.jpg 556 × 560; 231 KB
 Bazaar Docks Fishing Tournament.jpg 570 × 576; 419 KB
 Bazzi location.jpg 378 × 316; 186 KB
 Beacon kormir.jpg 307 × 244; 93 KB
 Beacon Lyssa.jpg 330 × 259; 87 KB
 Beacon palace.jpg 255 × 225; 93 KB
 Beacon Rurikton.jpg 312 × 235; 86 KB
 Beam of Light selected.jpg 761 × 634; 282 KB
 Beetle Juice overview map 1.jpg 971 × 649; 291 KB
 Beetle Juice overview map 2.jpg 885 × 1,085; 549 KB
 Beetle Juice overview map 3.jpg 894 × 1,075; 446 KB
 Belcher's Bluff Berddi.jpg 625 × 518; 114 KB
 Belcher's Bluff Caiwyn the Corsair.jpg 351 × 346; 73 KB
 Belcher's Bluff Graster Beakerbane.jpg 678 × 646; 201 KB
 Belcher's Bluff Maddie.jpg 566 × 532; 150 KB
 Beneath The Canopy Scout Locations.jpg 2,769 × 1,715; 729 KB
 Bian's Route.png 700 × 700; 1.11 MB
 Bid aurillium for an enchanted armor map.jpg 527 × 488; 152 KB
 Big Mayana Spawn.jpg 598 × 768; 174 KB
 Bioluminescent wreckage sample.jpg 742 × 686; 159 KB
 Bismuth location.jpg 757 × 518; 311 KB
 Bitterfrost Frontier Unbound Magic.jpg 854 × 263; 67 KB
 Bitterfrost Vantage Point map.jpg 890 × 896; 237 KB
 Black Citadel Pinata Locations.jpg 1,840 × 2,000; 635 KB
 Black Citadel Portal Scroll location.jpg 400 × 400; 49 KB
 Black Lion Stolen Goods Recovery Event (Siren's Landing) map.jpg 703 × 694; 281 KB
 Black Lion Stolen Goods Recovery Event Auric Basin.png 1,109 × 855; 1.5 MB
 Black Lion Stolen Goods Recovery Event bloodtide coase skritt location week 2.png 1,186 × 965; 1.61 MB
 Black Lion Stolen Goods Recovery Event caledon forest skritt location.png 1,085 × 536; 909 KB
 Black Lion Stolen Goods Recovery Event crystal oasis skritt location.png 901 × 744; 1.09 MB
 Black Lion Stolen Goods Recovery Event desert highlands skritt location week 2.png 1,290 × 1,600; 3.38 MB
 Black Lion Stolen Goods Recovery Event desert highlands skritt location.png 666 × 773; 1.12 MB
 Black Lion Stolen Goods Recovery Event Diessa Plateau.png 1,079 × 654; 1.09 MB
 Black Lion Stolen Goods Recovery Event domain of istan skritt location.png 779 × 784; 1.15 MB
 Black Lion Stolen Goods Recovery Event Domain of Kourna.png 1,414 × 1,566; 4.35 MB
 Black Lion Stolen Goods Recovery Event dragon's end skritt location.png 890 × 1,740; 2.6 MB
 Black Lion Stolen Goods Recovery Event ember bay skritt location.png 473 × 362; 296 KB
 Black Lion Stolen Goods Recovery Event Fields Of Ruin.png 763 × 466; 581 KB
 Black Lion Stolen Goods Recovery Event Frostgorge Sound.jpg 1,372 × 809; 242 KB
 Black Lion Stolen Goods Recovery Event Grothmar Valley.png 713 × 795; 1.11 MB
 Black Lion Stolen Goods Recovery Event jahai bluffs skritt location.png 1,949 × 1,414; 4.83 MB
 Black Lion Stolen Goods Recovery Event lake doric skritt location.png 1,032 × 503; 846 KB
 Black Lion Stolen Goods Recovery Event Lions Arch.png 778 × 721; 983 KB
 Black Lion Stolen Goods Recovery Event lornar's pass skritt location.png 600 × 895; 758 KB
 Black Lion Stolen Goods Recovery Event new kaineng skritt location.png 1,243 × 616; 1.65 MB
 Black Lion Stolen Goods Recovery Event seitung province skritt location.png 1,052 × 653; 1.16 MB
 Black Lion Stolen Goods Recovery Event Seitung Province.png 1,103 × 1,364; 2.8 MB
 Black Lion Stolen Goods Recovery Event snowden drifts skritt location.png 1,090 × 667; 807 KB
 Black Lion Stolen Goods Recovery Event Sparkfly Fen.png 1,024 × 742; 1.18 MB
 Black Lion Stolen Goods Recovery Event The Desolation.png 1,220 × 677; 1.8 MB
 Black Lion Stolen Goods Recovery Event verdant brink skritt location.png 798 × 483; 869 KB
 Black Lion Stolen Goods Recovery Event Verdant Brink.png 950 × 459; 842 KB
 Blazeridge Steppes Behem Gauntlet Permanent Rich Iron Vein.jpg 752 × 396; 218 KB
 Blazeridge Steppes Deserter Flats Possible Rich Iron Vein.jpg 484 × 395; 174 KB
 Blazeridge Steppes Heretic Plain Possible Rich Iron Vein.jpg 681 × 213; 141 KB
 Blazeridge Steppes Lowland Burns Possible Rich Iron Vein.jpg 591 × 377; 186 KB
 Blazeridge Steppes Monument Grounds Possible Rich Iron Vein.jpg 366 × 311; 112 KB
 Blazeridge Steppes Pockmark Roughs Possible Rich Iron Vein.jpg 641 × 457; 241 KB
 Blazeridge Steppes Unbroken Expanse Possible Rich Iron Vein.jpg 627 × 616; 344 KB
 Blistering Undercroft with hay bales.jpg 1,009 × 1,297; 1.06 MB
 Bloodfin Lake patrol route.jpg 680 × 512; 187 KB
 BloodstoneOverwatchCamp.jpg 365 × 375; 55 KB
 BloodstoneSliver-MountMaelstrom.jpg 336 × 366; 56 KB
 BloodstoneSliver-RataSum.jpg 370 × 368; 70 KB
 BloodstoneSliver-TimberlineFalls.jpg 374 × 364; 40 KB
 Blubloop location.jpg 573 × 573; 176 KB
 Blue Color Study Location.jpg 804 × 741; 584 KB
 Blue Ice Shavings location.jpg 609 × 895; 64 KB
 Blue-catmander-jumping-guide.jpg 1,692 × 992; 500 KB
 Blue-catmander-jumping-guide2.jpg 1,259 × 970; 329 KB
 Blue-catmander-landing-closeup.jpg 1,833 × 1,041; 1.06 MB
 Book of Vlast Page 07 location looking down onto ledge.jpg 3,222 × 1,737; 692 KB
 Book of Vlast Page 07 location.on ledge.jpg 3,210 × 1,632; 686 KB
 Bookworm Bwikki's path.jpg 2,402 × 5,913; 2.74 MB


.jpg)
.jpg)


.jpg)


_location.jpg)


_map.jpg)


