Test Zone 2
Test Zone 2
- Tier
- World 3 Test Zone 2
- Type
- Area
- Dungeon
- Super Adventure Box
- Connects to
- Hub
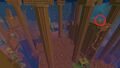
| Image(s) |
|
Click to enlarge. |

“The super adventure forges onward! The test world seems to have a deeper level—what fun new adventures can be discovered within?
— In-game description
Test Zone 2 is a testing zone of World 3 of Super Adventure Box.
Objectives[edit]
 Super Adventure Box
- Team Score: X
- Finished!
- Warping in: 0:30
Walkthrough[edit]
| Search YouTube for videos related to World 3 Zone 2. |
- Currently this zone has Normal mode only.
Starting Area to Checkpoint 1 (Waterslide; Underwater)[edit]


- (Optional) Interact with the campfire near the Cave Sage to activate the start checkpoint.
- (Optional) Visit Shop #1: A Potion Cart Merchant is located near the starting campfire.
- (Optional) Grab the first blue bauble between the Shop and the Coin Machine.
- (Optional) Grab the second blue bauble at the bottom of the ramp before the waterslide.
- Slide down the waterslide or walk on the right-hand edge of the waterslide to avoid cactus damage.
- Plunge into the water and use the buoyancy/low-gravity mechanic to jump across the platforms.
- (Optional) Underwater, near the broken wall and the first set of piranhas you can find
 #1:.
#1:. - (Optional) After the second set of piranhas, jump to the ledge past the cactus and look left to find #2:.
- From the last platform with piranhas, turn left around the corner to find the ramp leading back to the surface and Checkpoint 1.

Green Bauble #1
Green Bauble #2


Shop #1 items (Potion Cart)[edit]
| Item | Cost | Description |
|---|---|---|
| 20 |
Grants one extra life. | |
| 5 |
Restores one heart. |
Checkpoint 1 to Checkpoint 2[edit]

- #3 From Checkpoint #1, jump to the left (north - easy path), the bauble is on the ledge above the Shop #2.
 #1 From Checkpoint #1, jump to the right (south - hard path), follow the wooden beam jumps west. Turn left at the spider, climb the stairs and backtrack east along the higher level until you find the chest at the top of the ruin, almost directly above the checkpoint. If you jump down you can rejoin the path.
If you look northwest from the waypoint, you can see the next shop door. What you can't see is a chest above the checkpoint.
With the checkpoint in front of you, turn around 180 degrees. On the left, is a sloping wooden beam, providing access to a set of vertical beams that can be jumped across either to the left (north) or to the right (south). The easy main path is to the left (north). Head to the right (south), because after all, you're here for the achievements aren't you?
Cross the vertical beam jumps to a sloping pillar with an orange bauble and two spiders. If you look west from the first ledge you can see a first platform on the left with red bloodstone, and in the distance a staircase leading up to further bloodstone. Snake your way along to the far bloodstone, once you arrive you will find a doorway on the left with a further set of stairs, until you can turn back to face east - continue along the upper path back to above the checkpoint to find a chest. Rejoin the main path by jumping down to the north side.
Follow the path clinging to the rockface, collect the blue bauble, and find yourself at the shop you could see earlier. The shop only has a mini bomb for sale, so likely has nothing at all if you're a repeat visitor. Continuing past the shop door, head up to the next plateau to find a snake. If you stop at the pillar with a small amount of bloodstone, look north to see a green bauble - retrieve it and backtrack to the pillar. Head up the next slope to find two further snakes. There is a blue bauble to the left of the doorway. The second checkpoint is straight ahead of the doorway.

Green Bauble #3

Red Bauble #1


Shop #2 items (Potion Cart)[edit]
| Item | Cost | Description |
|---|---|---|
| 200 |
Can be thrown or placed; requires ammo. |
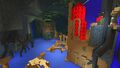
Checkpoint 2 to Checkpoint 3 (Underwater again)[edit]
From the checkpoint, if you look east you can see some ruins below with a stairway emerging from the water (you'll be heading that way shortly after checkpoint 3).
There is an optional blue bauble to the left of the checkpoint.
From the checkpoint, head north down the ramp collect a second blue bauble, and locate the wall with the torch on the left. If you carefully drop straight down from the torch you'll land on a sloping ledge. Follow it down, turn left and back on yourself to collect a third blue bauble on a small set of steps leading to the water's edge. Continue forwards slowly, adjusting your camera to be beneath the water's surface. If you look down you can see a fourth blue bauble. Pause here.
If you look to the right you can see a door (windy door) which opens and blows wind. This will knock you off the path if you time this poorly. Wait until it shuts, run past it, and then repeat this with a second windy door. Follow the path to the left (south), jump up and then over the chasm. Go around the back of the pillar and make the obscenely long underwater jump eastwards (grab the fifth and sixth blue bauble on the way), until you can clamber up the tree roots at the far side and the seventh blue bauble. Clamber up onto dry land and optionally fight the green ooze as they appear out of the ground. The checkpoint is immediately after a second spawn of oooze.
Checkpoint 3 to Checkpoint 4[edit]
- #2 From Checkpoint #3, jump to the right cross the waterfall next to Shop #3 (hard path), the bauble is in the chest at the most top of the ruin.
- #4 From Checkpoint #3, jump into the water to the right of the door to Shop #3, there will be Piranhas in front of the bauble.
From the checkpoint you can see: ahead of you above - a chest with the red bauble, and to the right, a shop. Start with the shop.
From the checkpoint, turn right to find the hidden shop, which only sells ooze (you can buy them, but why would you?). None of the furniture is breakable either. Backtrack to the checkpoint.
After emerging from the useless shop with the checkpoint in front, drop down into the water on the left to find six piranhas. Drop onto the next ledge down to find the green #4 bauble. Drop into the depths to die and return to the checkpoint.
With your back to the useless shop again, and the checkpoint in front, turn right and jump along the beams in front of the waterfall - onto the pillars, collect the orange bauble, and follow the path around the corner and anticlockwise up the ruins, over the bloodstone rock, and climb the stairs behind it to reach the chest with the red bauble #2. Jump down back to the main path at checkpoint #3.
Head west from the checkpoint and then up the leaning pillar, and follow the broken beams around to the staircase. There's a blue bauble at the top of the stairs. Turn right to find a further blue bauble, and checkpoint #4 (and a monkey which will rush at you).
Red Bauble #2

Green Bauble #4


Shop #3 items (Ooze Farmer)[edit]
| Item | Cost | Description |
|---|---|---|
| Green Ooze | 25 |
Not particularly tame. |
| Green Ooze | 25 |
Not particularly tame. |
| Green Ooze | 25 |
Not particularly tame. |
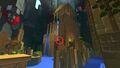
Checkpoint 4 to Checkpoint 5 (Waterslide)[edit]
Grab the blue bauble at the top, then jump into the waterslide. If you drop in a straight line ignoring the other two baubles in the water, you can simply jump over two cactii to land on the right-hand ledge with the monkey at the end of the slide.
Checkpoint 5 to Checkpoint 6[edit]
- #5 Just underwater in front of the Checkpoint #5.
In front of you is a small chasm valley with windy mouths and monkeys on ledges.
Start by ignoring the obvious sloping ramp, instead dropping down into the water beneath it. Two scuba monkeys will swim towards you. A third lies in wait. Kill it then head around to the right to find the hidden green #5 bauble. Return to the landing with the checkpoint, facing the obvious jump.
Standing on the top of the sloped pillar looking into the chasm valley, you will notice the rock face on the left occasionally opens (windy mouth), and to your right is a small pillar (there's a dodge jump to the right as an alternative if you can't get the timing right). Wait until the mouth closes, and jump to the lip in front of it. When it opens, jump up - you will be carried to the far bank.
Follow the ledges around, and repeat your new trick to cross the chasm. Kill the monkey and reach the vertical wind. There is an optional Owl shop to the left, where you can buy Mushroom Seeds which then grows a mushroom out of the pot in the corner allowing to skip the next section with the assassins.
Use the vertical wind to ascend. You are attacked by three assassins (one in front, two behind) in the next corridor before the checkpoint.

Green Bauble #5

Shop #4 items (Owl)[edit]
| Item | Cost | Description |
|---|---|---|
| 5 |
Restores one heart. | |
| Mushroom Seeds | 50 |
Instantly grows a nearby shortcut. |
Checkpoint 6 to Checkpoint 7[edit]
- #3 At the top of a pillar in the middle of the cave surrounded by water.
- #6 At the top of a pillar next to #3.
- #7 From Checkpoint #6, head forward to the edge of the map, the bauble is underwater in front of the Secret Shop (
 Business Is Underwater).
- To get in the shop, the Catch and Release achievement from Test Zone 1 must be completed.
- To get in the shop, the
From the checkpoint, follow the stairs down, picking up the blue bauble, south past the snakes, to a set of stairs leading down into the water.
Ignoring the stairs, climb up onto the pillars to the right of the stairs to collect an orange bauble. Continue forwards/east along the various jumps (if you fall, backtrack to the stairs). When you reach the grassy top, face back west and proceed until you find the chest with the red bauble #3. If you look to the right, you can see the next green bauble. Retreat back to the grassy top, and head west to collect green bauble #6. Drop down to the stairs.
From the top of the stairs, continue south at ground level, past the bloodstone shard, and drop into the water, turning 180 degrees to find two piranhas and the closed shop entrance. Nevermind, turn back to where you dropped down - you can see underwater green bauble #7 nearby. Head back north to the top of the stairs.
Follow the stairs down into the water and follow the path east. Turn left after the earthworks and find a blue bauble alongside a set of stairs emerging out of the water.
At the bottom of the stairs, facing northeast from within the water, proceed underwater until you find a slope heading into the depths. Rather than jumping in, at the bottom of the slope head right, finding a further passageway beneath the slope, leading to a ramp with cactii. Jump up the ramp, and then use the ledges on the pillars to reach a hidden chest (Ahead of the Game). Jump off into the chasm to return to the checkpoint, heading down the first set of stairs, past the snakes, down the stairs into the water, and along until the earthworks stair at the far end.
At the top of the long stairs is a monkey with a baseball bat. Follow the path to the right to find another two monkeys throwing stuff and two blue baubles. Cross the fast flowing water to encounter another two monkeys. A blue bauble sits beneath a doorway; ignore it for a moment to enable the checkpoint.

Red Bauble #3
Green Bauble #6

Green Bauble #7


Shop #5 items (Secret Shop underwater)[edit]
| Item | Cost | Description |
|---|---|---|
| A Sold Out sign written in New Krytan. | ||
| 5 |
Restores one heart. |
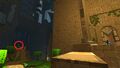
Checkpoint 7 to Cage (Sealed treasure)[edit]
- #8 From Checkpoint #7, instead of getting in the building, walk to the left, the bauble is in grass area next to it.
With the obvious doorway/corridor to your back, turn right from the checkpoint to collect a different blue bauble, kill/ignore two spiders and jump up the small platform to grab the last green bauble #8. Turning back to face the direction you came from, you can see a set of stairs bypassing the corridor.
- If you take the bypass stairs there are three blue baubles.
- If you return to the corridor the doors will close at both ends until you kill the assassin ambush. The corridor does however contain a shop.
After either route, you'll find a further five blue baubles leading you along an obvious route to the final boss cage.
If you aren't confident about your ability to defeat the Cage boss with your remaining life, there is a bouncy mushroom in the corner of his platform that you can drop to create a shortcut.
Green Bauble #8

Shop #6 items (Choya Miner)[edit]
| Item | Cost | Description |
|---|---|---|
| 20 |
Grants one extra life. | |
| 5 |
Restores one heart. | |
| A Sold Out sign written in New Krytan. |
- You need to understand the Choya language to buy items from this shop.
- Note: There is a Golden Scoop at the back of the shop, but it cannot be obtained.
Achievements[edit]
- See also: Super Adventure Box: Quality Testing
| Super Adventure Box: Quality Testing | 3 | |
|---|---|---|
Find a secret sealed treasure chest in the World 3 Test Zone 2.
|
Located the Treasure | 3 |
- From Checkpoint #7 (the last checkpoint), follow the path to the grassy area. When you reach the end, drop down to a grassy ledge to your right, and then to the water. There are some brickwork ledges below the edge of the drop to the abyss. From the lower ledge, enter a passageway and jump up a slope containing cacti. You'll come to a room.
- From the back left corner you can climb along some ledges and jump to the platform on top of the middle column, which supports the chest. It's easiest to reach from the column that is close to the entrance.
| Business Is Underwater | Super Adventure Box: Quality Testing | 1 |
|---|---|---|
Enter the secret shop in World 3 Test Zone 2.
|
Secret Shopped | 1 |
- After Checkpoint #6, in the area with small green trees, go down the stairs and follow the wall until you come to stairs that lead to the water. Go under water and continue following the right wall, until you come to a door. Inside the room, jump up to a higher floor and you'll find the shop, operated by a piranha.
| Further Adventures, Under 3 | Super Adventure Box: Quality Testing | 5 |
|---|---|---|
| Complete World 3 Test Zone 2. | Completed World 3 Test Zone 2 | 5 |
| Super Adventure Box: Quality Testing | 5 | |
|---|---|---|
| Find all the green baubles in World 3 Test Zone 2. |
Found 8 Green Baubles in World 3 Test Zone 2. |
5 |
| Super Adventure Box: Quality Testing | 5 | |
|---|---|---|
| Find all the red baubles in World 3 Test Zone 2. |
Found 3 Red Baubles in World 3 Test Zone 2 |
5 |
Digging spots[edit]
- None.
Rewards[edit]
- 50
 Baubles
 - Glorious Chest (once per day per zone) containing:
- 2
 Bauble Bubbles
 - 1
 Continue Coin
 - Rare chance of the following:
- 2

NPCs[edit]
Allies[edit]
- Cave Sage
- Choya Miner
- Piranha (yellow) (if Catch and Release has been completed)
- Potion Cart Merchant
- Shopkeeper
Foes[edit]
- Assassin (purple)
- Assassin (red)
- Assassin (white)
- Cage
- Monkey (brown)
- Monkey (blue)
- Monkey (green)
- Ooze (blue)
- Ooze (green)
- Piranha (red)
- Piranha (yellow)
- Snake (orange)
- Spider
Objects[edit]
Notes[edit]
- Foes have more hit points than in World 1 and 2.
- Blowing mouths under water can be used to jump further
Bauble (1 ![]() • 5
• 5 ![]() • 10
• 10 ![]() • 20
• 20 ![]() • 50
• 50 ![]() ) •
) • ![]() Bauble Bubble
Bauble Bubble
Continue Coin • Infinite Continue Coin • ![]() Fancy Furniture Coin
Fancy Furniture Coin
| Skills and Upgrades |
• Purse
|
|---|---|
| Hub | World 1 House • World 2 House • World 3 House • World 4 House |
| World 1 | Z1: Sunny Glade (TM) • Z2: Dark Woods (TM) • Z3: Kingdom of Fungus (TM) • B: Cart |
| World 2 | Z1: Rapids (TM) • Z2: Pain Cliffs (TM) • Z3: Storm Top (TM) • B: Robbers |
| World 3 | Z1: Test Zone 1 • Z2: Test Zone 2 |
| Other zones | Ooze Kitchen • Sparkling Pools |
| Adventures | Super Adventure Hub Super Adventure 1-1 • Super Adventure 1-2 • Super Adventure 1-3 Super Adventure 2-1 • Super Adventure 2-2 • Super Adventure 2-3 Super Adventure Test Zone |
| Achievements | |
| Collections | The Super Adventure • The King Toad • The Storm Wizard The Crimson Assassin • The Glitched Adventure • The Kaiser |